background

Monday, November 23, 2009

It's Almost Turkey Time!

I love hosting Thanksgiving because it's all about the food and I love trying a few new recipes out on my family. They are very traditional food people so I usually only get a few thumbs up because what I can I say, they love meat and potatoes and don't mess with those potatoes. Slowly but surely they are getting used to my new recipes which always come from 'Taste of Home' magazine which my grandma always got for me.

I went to the grocery store to get all of my groceries on Sunday night and let me tell you people, that is the best time to do your grocery shopping! The shelves had just been restocked and there were only a few people there - yes - no playing bumper grocery carts today! Anyways - if you haven't already, start defrosting that turkey people. I bought the biggest turkey I could find which was only 22 pounds and I have 17 people coming over and we MUST have left-overs. So I think I'm going to make a small ham as well, I just need to make sure that both will fit in my oven first.


What I'm serving on Turkey Day:
  • Orange glazed turkey
  • Cornbread Stuffing (on the Oprah show last year - it's the best!)
  • Ham - I'm worried I'll run out of turkey so may need to get a small one
  • Mashed pototoes
  • Gravy
  • Corn
  • Pumpkin Pie Dip with apple and pear slices
  • Green bean casserole
  • Deviled Eggs
  • Rolls
  • Boston Cream Pie
  • Pumpkin Cheesecake
  • Turkey cookies for the kids
  • Cranberry Punch
  • Apple Cider
  • My favorite white wine - Line 39
I'm always worried people will leave hungry so I'll probably add 1 or 2 more dishes before the big day.

P.S. I'm not making all of this by myself - I have lots of help thanks to my lovely guests. Thanks in advance.

Sunday, November 15, 2009

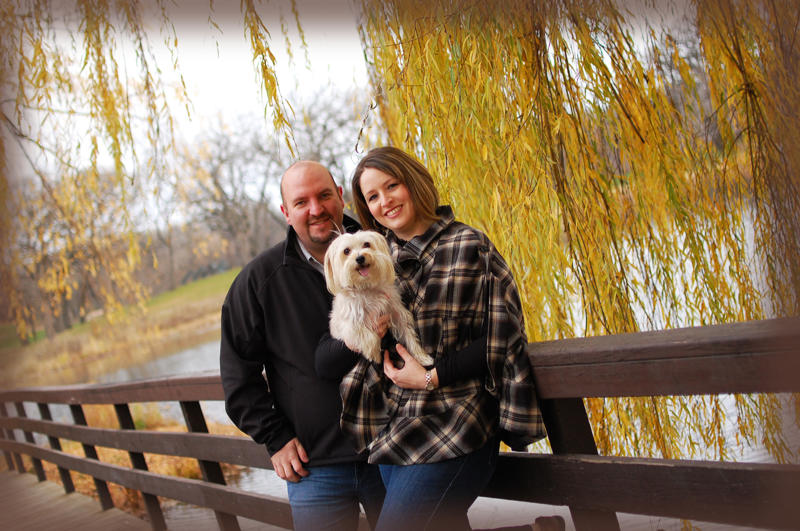
Our Fall Photoshoot

For those of you that know me, you know how much I love sleeping in on the weekends especially since I'm not a morning person. Well today I made an exception to my sleeping in on Sunday's rule for a photoshoot at Veteran's Acres. My friend Brooke loves photography like me and offered to shoot some pictures of us using her new portrait lens (Nikon 35mm). I absolutely love her new lens and so did my hubby so I think their is a portrait lens in my future if Santa treats me well. Santa if you are listening I want the Canon 50 mm/1.8 lens - pretty please! Anyways, enough about me, we hope you enjoy the pictures Brooke took this morning.


P.S. There are many more and I can't wait until I get the disc of photos from Brooke.
P.S.S. Would you like to see more photos that Brooke has taken? Check out her blog - Second Time Mommy. She has some serious phototaking skills and I better book our next shoot with her before she's too popular!!!

Thursday, November 12, 2009

Birthday Card – Painting a Flower


I made this birthday card for my MIL recently and used a new technique to give the flower a watercolor look. I found the technique online and didn't have exactly the right cardstock but I tried it anyways – I think it would have looked better if only I had the right paper but it was worth a try. What matters is that my MIL loved it and I'm sure only I notice the imperfections in the flower. Can you tell why I don't like the paper used?

Are you curious about the new technique that I used on the flower? Unfortunately I can't find the website link which contained a how to video but I'll do my best to describe it to you. First I stamped the image on white shimmer paper with versamark, sprinkled embossing powder on the image and then embossed it with my heating tool. Then you cut out the image and use a squirt bottle to cover it with water. Then I use my aqua painter to pick up a drop of the ink I used and then touched the aqua painter to the image and the water spreads the ink across the image. This is what creates the variation in color. You can mix different colors if you would like and once you like the color combinations, let it dry for about 30 minutes. And look at that – you now have a pretty cool flower.


Supplies Used:

  • Stamps – Fifth Avenue Floral
  • Paper – SU patterned paper, basic black, basic gray, very vanilla, white shimmer paper
  • Ink – VersaMark, basic gray, purely pomegranate (used on flower)
  • Other – embossing powder, heating tool, brads, ribbon, aqua painter

Windows 7 – Love It!


I am trying a little experiment and right now I LOVE Windows 7! We just got it at work and I attended training today and learned that I had no clue about all of the cool stuff it could do. Right now I'm just testing out this blog feature that let's you blog right from Word!!!! How awesome is that seriously!

Wednesday, November 11, 2009

Halloween Recap

My apologies for the delay in getting our Halloween Recap posted for all of you. We had a great Halloween and always look forward to this holiday - it's all about just plain ole fun!

Tanner & David


Me & Tanner

Tanner - begging us to take his prisoner costume off of him.

Our neighbors all dressed up for the festivities.

Michael & Alex
Look at that adorable Wall-E costume that his parents made!


We hope everyone enjoyed Halloween as much as we did.

Thanksgiving Invitations

We are hosting Thanksgiving this year and I decided that every celebration calls for an invitation - right? Ok, I got a new stamp set with this adorable silverware set and I just had to use it. I love the antique silverware and the classy look it gives to the invitation. Simple but I still love them.


Supplies Used:
  • Stamps - Compliments to the Chef
  • Paper - Rich Razzleberry, Dusty Durango, Whisper White
  • Ink - Dusty Durango, Soft Suede
  • Other - twine, oval punch, paper piercer

Saturday, October 31, 2009

Boogie Man Pumpkin Carving

We haven't carved a pumpkin for a few years but this year I thought it was time to get into the pumpkin carving spirit. Plus I wanted to roast some pumpkin seeds and boy were they good! David and I tag-teamed the pumpkin carving and he was more of the "guts" guy and I was more of the carving gal. We got her done regardless and while I was carving, David was roasting the seeds he got from the pumpkin. Oh, we got a large pumpkin to carve but when we went to bring it in we discovered that it was beginning to rot -ugghhh, so I had to improvise and use one of the smaller ones we got just for decoration so the original art of work we planned on carving had to be changed.


Look at this concentration - carving is serious business.

Here's the boogie man peeking out of the blinds. Scary don't you think?!?!?

Happy Halloween everyone!!!

Thursday, October 29, 2009

House of Haunts

I love making Halloween cards for the little kids and this year was no exception. These cards were easier to make than they look and the embossed haunted house I think really makes it pop on the card and makes it even spookier. Don't you think? Oh and the subtle scary looking trees look even scarier with the tone on tone. That is a new idea I used in this card that I haven't with others and will definately be incorporating that in more cards in the future.


 HAPPY HALLOWEEN!
Supplies Used:
  • Stamps - House of Haunts
  • Paper - whisper white, basic black, rich razzleberry, crushed curry, kiwi kiss
  • Ink - crushed curry, basic black, versamark
  • Other - black embossing powder, heat tool for embossing

Wednesday, October 28, 2009

Pumpkin Pie Bars

Thanks for your feedback on which pumpkin dessert I should make for my hubby's return home. Not only did I have to clean up after myself all week (that was hard work), but I missed my hubby so much that I wanted to give him a warm welcome home. Therefore he will be welcomed home by some delicious, out of this world - Pumpkin Pie Bars thanks to a recipe I found on Joy the Baker's blog - that girl has some serious baking skills and her photography of her baked goods has me drooling. My pictures don't do these bars justice but you get the idea, can you smell the pumpkin spice from here?


RECIPE

1-1/3 cups flour
3/4 cup granulated sugar, divided
1/2 cup packed brown sugar
3/4 cup (1-1/2 sticks) cold butter or margarine
1 cup old-fashioned or quick-cooking oats, uncooked
1/2 cup chopped walnuts
1 pkg. (8 oz.) cream cheese, softened
3 eggs
1 can (15 oz.) pumpkin
1 Tbsp. pumpkin pie spice
1 teaspoon vanilla extract
2 teaspoons bourbon (optional)
a handful of butterscotch or chocolate chips for sprinkling on top (optional)

HEAT oven to 350°F. Line 13×9-inch pan with foil, with ends of foil extending over sides; grease foil. Mix flour, 1/4 granulated sugar and brown sugar in medium bowl; cut in butter with pastry blender or 2 knives until mixture resembles coarse crumbs. Stir in oats and nuts.

RESERVE 1 cup oat mixture; press remaining onto bottom of prepared pan. Bake 15 min. Beat cream cheese, remaining sugar, eggs, vanilla, bourbon, pumpkin and spice with mixer until well blended. Pour over crust; sprinkle with reserved crumb mixture and a handful of butterscotch or chocolate chips (if desired).

BAKE 25 min.; cool 10 min. Use foil to transfer dessert from pan to wire rack; cool completely.

ENJOY Stick fork into the yummy goodness and chow down. Yummy!

Monday, October 26, 2009

Pumpkin Desserts - Decisions, Decisions

Last fall do you remember those delicious to die for Pumpkin Whoopie Pies that I made? They were the BEST treats I have ever made and I love to bake. If you missed out, click here for some pictures and the recipe.

With the hubby out of town and the autumn chill in the air, I am in the mood for some baking with my favorite flavor this time of year - pumpkin! I need your help with what I should bake this week.


Should I make these Pumpkin Whoopie Pies again by Rachel Ray?


or should I try these Pumpkin Pie Bars by Joy the Baker?


or should I try these Pumpkin Cookies with Butterscotch by Joy the Baker?


Decisions, decisions, decisions! I want to make them all but that's probably not a good idea for me or my waistline. I'd love to get your thoughts, my canned pumpkin is anxiously awaiting your replies on my counter.